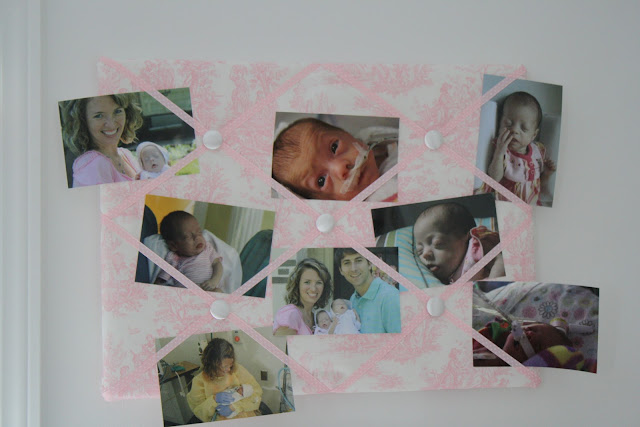
Happy Friday everyone!
After the nursery post, I have had several friends ask me how to make a picture board. It is a very easy project that can be done in one afternoon. Below are the steps and the items you need to make your very own memory board! Enjoy!
What you need:
1 foam board (cut in half)
Quilters Fusible Batting
Fabric to cover board (1/2 yard should be plenty)
5 buttons
1 spool of ribbon
Scissors
Staple Gun
Needle & Thread
Hot Glue Gun
Iron and Ironing Board
Razor Blade Knife
Pencil
To begin this project, lay your foam board on your work space and cut it in half with your razor blade knife.
Next, you will need to cover your board with your Quilter's Fusible Batting.
As you can see below, I had enough batting material to cover the back of the board on all sides. If you cut about two feet of batting that should give you enough to cover the back of the board. Depending on the thickness of your batting, you might need to do a double layer to make the board thicker. If you need to do this, just fold the batting over and then cut two feet so it will be thicker.
Once your board is covered with batting, you staple the batting to the back of the board. I started with my sides and then stapled the top and bottom. Put one staple in each corner and then a couple in the middle to secure it to the board. Make sure your staples are long enough to stay in the board. In order for your corners not to become too thick, cut out a square on your left and right side corners before you staple the top and bottom pieces to your board (see picture below, bottom right corner).
After the batting is secured, now is the time to place the fabric on the board. Make sure your fabric has been ironed so there are no creases on it before it is secured to the board. Just like the batting, make sure you have enough fabric to secure it to the back. My fabric length is longer than my batting to make it easier to staple it to the board.
After all sides of the fabric are stapled to the board, now is the time to secure the edges. To do this, simply fold your edge over to make a triangle. Using your hot glue gun, glue the triangle portion of your fabric to the straight edge of your fabric. When you do this, you create a clean line that won't be seen from the front of your board.
The next step is to attach your ribbon to your board. You will have six pieces of ribbon that will overlap to create a diamond look on the front of your board. To begin, we will attach the corner pieces to the board. Using your hot glue gun, glue an inch of the ribbon to the top left corner. Once the glue has dried, pull that ribbon on the diagonal of the front of the board to the bottom right corner. Pull the ribbon tight and make sure you have about an inch to secure to the back of the board before you cut. After cutting this ribbon, secure the bottom right corner to the back of the board with your hot glue gun. Repeat this process for the other diagonal piece.
After you have your corner pieces secured, now is the time to do the middle pieces. It is important that everything is centered correctly so your ribbons are spaces evenly when finished. Lay your ribbon horizontally so it is aligned with the center diagonal and make a mark with a pencil on your center sides. Then, lay your ribbon vertically on the center and make a mark with a pencil on your top and bottom center. After doing this, start with the left center and secure the ribbon to the back of your board with your hot glue gun. Then, run the ribbon so it meets your top center and secure that to the board. Do the same thing on the right side. After your top ribbons are secured, repeat the process starting with the left middle meeting the bottom center.
The final step to finish your board is to add your buttons. You will have five buttons to secure to each point where your ribbons cross over one another. Thread your needle and loop it through the back of your button. Then, over the center of your ribbon, stick your needle through your fabric so it comes out of the back of the board. Once your needle has pierced the back of the board, stick it through again to the front and loop it through your button. Do this about three times until it is tight and then tie your thread in a knot to keep it in place. For added security, you can hot glue the back of your board where the thread is to make sure it stays in place. After you have completed this step, just add some fishing line or one of those grooved edge picture holders to the back of your board to hang it to the wall.
Voila! You have just made your very own picture board! What an easy way to showcase your favorite pictures! If you make a board, send it to christen@theuncontainabletruth.com so we can add it to our site :)
Till next time, let your light shine!
Blessings, christen
Friday, August 27, 2010
0 Christen's Crafts: How To Make A Picture Memory Board
Posted by
Christen Price
at
Friday, August 27, 2010
Subscribe to:
Post Comments (Atom)
 All Posts


0 comments:
Post a Comment